Hello again, everyone! Sorry I didn't post anything for a couple days. Today's post is another tutorial! I was planning on doing a video for this one but my camera is still not working. I will still make a video for it later, but hope you're all happy with this for now. This design is so simple, I think anyone can do it. If you have trouble don't give up, just keep trying. So, Let's get started!
If you want to see how I created this look, just keep reading!
Products used:
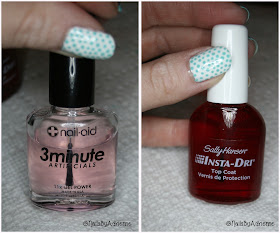
Base coat: Nail-aid, 3 minute artificals
Mint green: Rimmel 60 seconds, Mintilicious
White: Sinful Colors, Snow Me White
Silver Glitter: Art Deco, Silver Glitter
Top coat: Sally Hansen, Insta Dry
__________________________________________________
Step 1: Start by applying your favorite base coat to all of your nails. Always remember to go along the free edge of your nails to help prevent chipping. The free edge is the very tip of your nails. Do this with every coat of nail polish you apply for best results.
Step 2: Choose which nails you want to be your accent nails, and leave them bare. Paint the tips of your non-accent nails in the color of your choice. I chose a mint green. 1-2 coats should be all you need. We're going to call this color, "color 1", later on in this tutorial.
__________________________________________________
Step 3: With the second color of your choice,(I chose white) paint 1-2 coats on your accent nails. Allow your nails to dry well before moving onto the next step. We're going to call this color, "color 2" later on in this tutorial.
Step 4: Using a toothpick or dotting tool, dipped in color 2, place dots all over the tips of your non-accent nails.
__________________________________________________
Step 5 and 6: Using a toothpick or dotting tool dipped in color 1, start to fill in the whole accent nail with small dots. I find dotting in diagonal lines gives the best results for this. Try and keep the dots about them same size for best results.
__________________________________________________
Step 7 and 8: Just follow the last 2 steps. Using a dotting tool or toothpick dipped in color number 1, make small dots in diagonal lines. Continue until the whole nail is full of dots.
__________________________________________________
Step 9: Using a striper make a small line at the bottom of the tips. This just gives a more finished look. It also helps to hide if you didn't have perfectly straight tips. I used a silver glitter striper. You can skip this step, or use any color you want.
Step 10: After giving your dots a few minutes to dry, apply your favorite top coat to seal in your design.
__________________________________________________
If you want, use a paint brush, or cotton bud dipped in nail polish remover clean up any polish that you may have gotten on your skin. Apply your favorite cuticle oil over the whole nail and you're all done!
__________________________________________________
__________________________________________________
You made it to the end of today's tutorial! I hope you found this tutorial helpful! Don't forget to like me on Facebook, and all my other social media sites if you want to stay up to date on what I'm doing! Ask me questions, request tutorials, I can't wait to hear from you!
Have a Blessed day,


No comments:
Post a Comment