Showing posts with label purple. Show all posts

Friday, June 28, 2013

Video Tutorial: Purple Lace nails


 Hello again everyone! I'm happy to bring a new video tutorial as I promised in my last blog post. I hope you've all had a great week, and are ready for the weekend. I hope you enjoy my new video! Leave me a comment telling me what kind of video or blog post you'd like to see next! If you have any questions feel free to ask. I'd love to hear from you. Like me on Facebook to see more from me. I'm also on Instagram and Pinterest, and Twitter . Check out my other blog if you'd like to see non nail related blogs.
Have a Blessed day,


 You can also watch my video here!
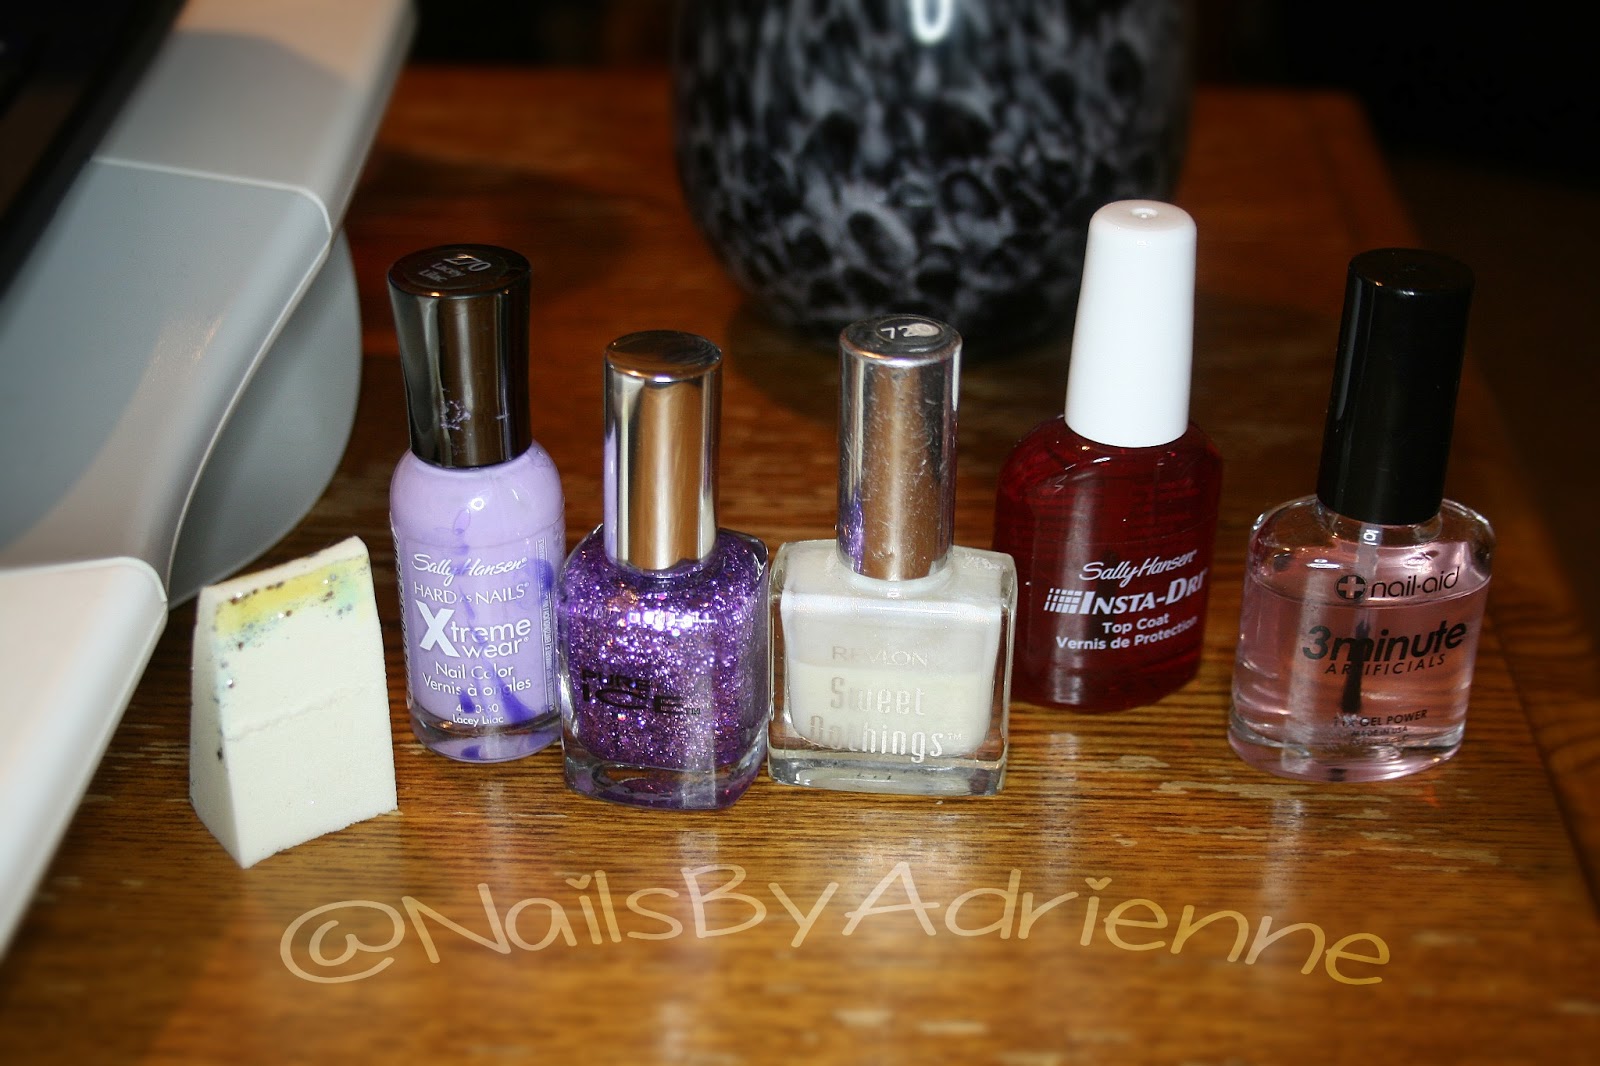


Products used:
Base coat: Nail-aid, Triple wrap thickener
Purple: Pure Ice, Jail Bait
White: Apple Barrel Colors, White
Top coat: Sally Hansen, Insta-Dri
Get the paint brushes I used here
Get the dotting tools I used here


Saturday, June 15, 2013

Tutorial: Purple glitter with rhinestones


 Hello again everyone. I hope you're all looking forward to the weekend. I'm just getting over an oh so enjoyable summer cold. So, I'm sorry for the lack of blogs this week. I'm feeling human again, so time to get back into blogging. I have a new tutorial for you today! I hope you are excited! So if you want to see how I created today's design, keep on reading! If you have any questions feel free to ask. I'd love to hear from you. If you try this design out, share it with me on Facebook, Twitter or Instagram, I'd love to see! Like me on Facebook to see more from me. I'm also on Instagram and Pinterest, and Twitter . Check out my other blog if you'd like to see non nail related blogs. 
Have a blessed day,


Products used:
Base coat: Nail-aid, Triple Wrap Thickener
Purple: Sally Hansen, Good to Grape
Purple glitter: Pure Ice, Darkside
Silver glitter striper: Art Deco, Ice Breaker
Top coat: Sally Hansen, Insta-Dri
Dotting tool(for applying the rhinestones)
2mm Rhinestones


 Step 1: As always start with applying your favorite base coat.


Step 2: Using the color of your choice on your accent nails paint the whole nail, and on all other nails do an angled tip.


 Step 3: Using a coordinating glitter paint your accent nails. I used 2 coats of a chunky purple glitter. 


Step 4: Using the same glitter you used on your accent nails apply 1 thin coat over the purple tips. 


 Step 5: Using a silver nail striper apply a thin line of glitter on the base of your purple tips.


 Step 6: This is an optional step. If you have some rhinestones apply one on the corner of the tips, and then apply 3-4 going up the center of your accent nails. I use a toothpick  or dotting tool to pick up the rhinestones. You can either use glue to stick them in place or paint a coat of top coat and stick the rhinestones on before it dries.


 Step 7: Using a paint brush or a cotton bud dipped in nail polish remover remove any polish that might have gotten on your skin. This is the last step, I hope you give this design a shot. 


Friday, April 26, 2013

NOTD: Purple Tips, with gold accents

Hello again, everyone! It's Friday, and I have another blog post for you today. It's another simple NOTD(nails of the day). Today, my nails are a simple design anyone can do. You can use any color you want, I used a purple with a gold shimmer. I hope you like this design, I feel it's so simple I don't need to do a tutorial on it. However, if you want to see a tutorial on this design let me know and I'll make it happen. That's it for today, I hope you're all having a great Friday. Don't forget to like me on Facebook, and follow me on Instagram and Twitter to stay up to date with what I have going on.
Have a Blessed day,


Products used:
Base coat: Nail-aid, Triple wrap thickener 
Purple with gold shimmer: Pure Ice, Purple Reign 
Gold Glitter Striper: Art Deco, Gold Glitter
Top coat: Sally Hansen, Insta Dry


 As always, I started with a base coat. Then I applied 2 coats of a purple with gold shimmer to the tips of my nails, and let it dry for a couple minutes. Next, I applied a line of gold glitter with a gold glitter striper at the base of the purple tips. I let that dry for a couple minutes, and then applied my current favorite top coat. Lastly, I went in with a paint brush dipped in nail polish remover and cleaned up any nail polish that got on my skin. 


Monday, April 22, 2013

NOTD: Purple Gradient Nails

Happy Monday, everyone! I know Monday isn't everyone's favorite day of the week. So, I'm trying to do my part to make your Monday a little bit better with a new blog post. Today's post is a NOTD(nails of the day). I was feeling a little lazy when I did these, so they are pretty simple. It's a purple gradient glitter. I hope you like them, and give them a shot. I have a tutorial on gradient glitter nails already, if you want to check it out. When I have a working video camera, I will do a video tutorial on them, as well. I hope your Monday is going well, and find this post as a little break from the Monday blues. Don't forget to like me on Facebook if you want to see what I'm up to. Follow me on Instagram for lots of pictures from my life.
Have a blessed Monday,


Products used:
Base coat: 3 Minute Artificials
Light Purple: Sally Hansen, Lacey Lilac 
Sheer Glitter: Revlon Sweet Nothings, Satin Sheets
Chunky Purple glitter: Pure Ice, Darkside
Top coat: Sally Hansen, Insta Dry
1 Cosmetic Wedge Sponge
__________________________________________________


I started by painting my nails with a base coat. Next, I painted them in a light purple. When that dried, I painted a thin coat of a sheer fine glitter. The sheer fine glitter helps the gradient effect look like it carries all the way down the nail. Then, I used the cosmetic wedge to sponge the purple glitter onto the tips of my nails. I let that dry, and used my current favorite top coat. Lastly, I used a paint brush dipped in nail polish remover to clean up any nail polish that got on my skin.

__________________________________________________