Showing posts with label gradient glitter nails. Show all posts

Wednesday, October 16, 2013

NOTD: Mom's fall gradient glitter nails

Hello again everyone! I have a little bit of a different post today. I decided I would paint my mom's nails tonight(without even talking to her). We are finally almost done with painting the house. So, tonight was perfect for pampering my mom. She has the longest, and strongest nails perfect for nail art!! I'm so jealous! I thought I would do a post on the nails I did for her since I haven't posted in a while(again). I'm hoping to get some fall nail tutorials up soon. Fall is my favorite time of year for nails, so many cute things to do. If you have any questions feel free to ask. If you try these nails out I'd love to see, share them with me on any of my social media sites. I'd love to hear from you. Like me on Facebook to see more from me. I'm also on Instagram and Pinterest, and Twitter . Check out my other blog if you'd like to see non nail related blogs. 
Have a Blessed day,


__________________________________________________

Products used
Sally Hansen - Nail Growth Protein
Orly - Rockin' Rocket
Art Deco - Gold Glitter
Sally Hansen - Insta-Dri
1 cosmetic wedge
__________________________________________________


 I did a simple Gradient glitter design. I already have a tutorial on gradient glitter nails. Check it out here! I went with fall colors. I love the redish color, it has very fine gold glitter in it. That makes for the perfect base for a gradient glitter design.

__________________________________________________


Monday, May 20, 2013

NOTD: Grey and Black Gradient Glitter Nails

Hello again everyone! I hope you're all having a great Monday. I have another NOTD(nails of the day) post for you today. I hope you enjoy today's nails. I'd love to hear your thoughts on it.  If you have any questions feel free to ask. I'd love to hear from you. Like me on Facebook to see more from me. I'm also on Instagram and Pinterest, and Twitter . Check out my other blog if you'd like to see non nail related blogs. 
Have a blessed day,


Products used:
Base coat: Nail-aid, Triple wrap thickener
Light grey: L.A. Colors, Lost Soul
Fine silver glitter: Sinful Colors, Queen of Beauty
Black based holo glitter: China Glaze, Some like it haute
Base coat: Sally Hansen, Insta-Dri
1 cosmetic wedge 


If you'd like to learn in more detail how I got this look, check out my Gradient glitter nail Tutorial blog post. The only difference is I used 2 glitters today. I went in first with a fine silver glitter and sponged it 2/3 down my nail, waited for it to dry thin sponged the larger glitter on the very tip.


Monday, April 22, 2013

NOTD: Purple Gradient Nails

Happy Monday, everyone! I know Monday isn't everyone's favorite day of the week. So, I'm trying to do my part to make your Monday a little bit better with a new blog post. Today's post is a NOTD(nails of the day). I was feeling a little lazy when I did these, so they are pretty simple. It's a purple gradient glitter. I hope you like them, and give them a shot. I have a tutorial on gradient glitter nails already, if you want to check it out. When I have a working video camera, I will do a video tutorial on them, as well. I hope your Monday is going well, and find this post as a little break from the Monday blues. Don't forget to like me on Facebook if you want to see what I'm up to. Follow me on Instagram for lots of pictures from my life.
Have a blessed Monday,
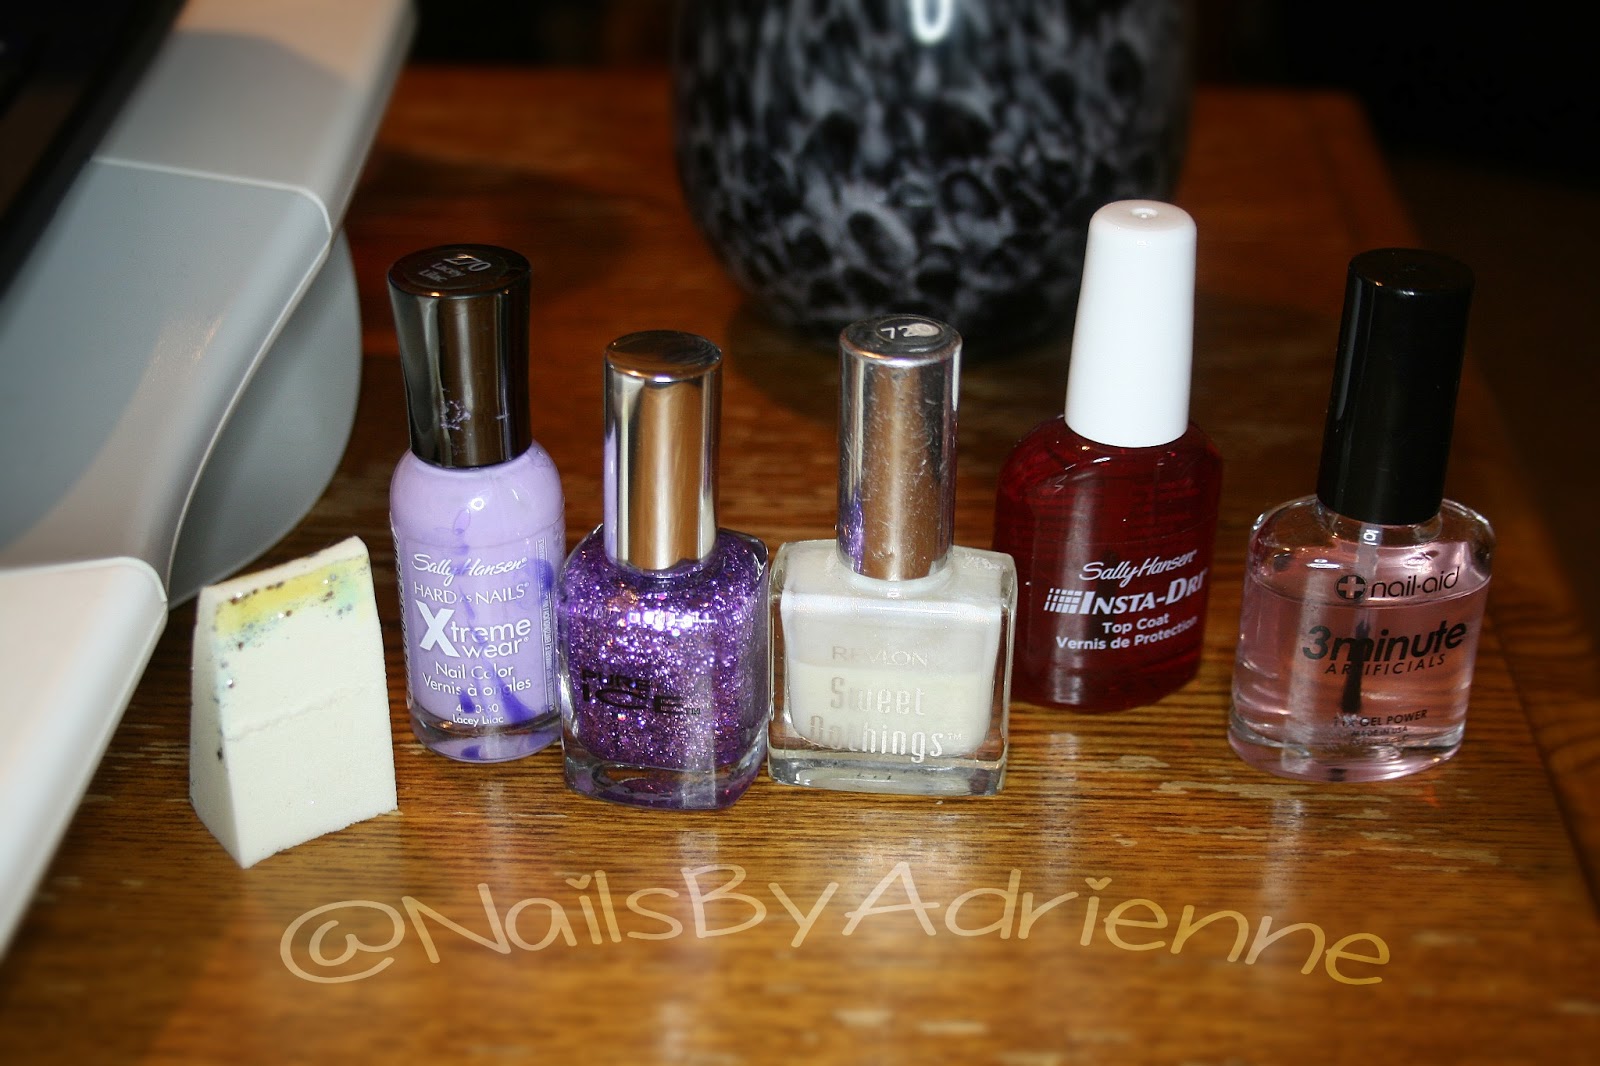


Products used:
Base coat: 3 Minute Artificials
Light Purple: Sally Hansen, Lacey Lilac 
Sheer Glitter: Revlon Sweet Nothings, Satin Sheets
Chunky Purple glitter: Pure Ice, Darkside
Top coat: Sally Hansen, Insta Dry
1 Cosmetic Wedge Sponge
__________________________________________________


I started by painting my nails with a base coat. Next, I painted them in a light purple. When that dried, I painted a thin coat of a sheer fine glitter. The sheer fine glitter helps the gradient effect look like it carries all the way down the nail. Then, I used the cosmetic wedge to sponge the purple glitter onto the tips of my nails. I let that dry, and used my current favorite top coat. Lastly, I used a paint brush dipped in nail polish remover to clean up any nail polish that got on my skin.

__________________________________________________


Saturday, April 20, 2013

Nail Polish Review: Dazzle Me, by Pure Ice

Hello again, everyone! I have another exciting blog post for you today. Today we will be talking about one of my new favorite chunky glitter polishes. If you love chunky holographic glitter polish, then you need to check this polish out! 


The above photo  is with 2 coats of Dazzle Me, by Pure Ice

The polish is, Dazzle Me, by Pure Ice. This is one of the new colors for 2013, and from what I hear it can be hard to get your hands on. So, I suggest you run to Walmart and get it while you still can! I love Pure Ice polishes in general. They are affordable, and what you see in the bottle is normally what you get on your nails. They have some sheer polish. However, you can normally tell in the bottle if it's going to be sheer or not. Moving on, back to Dazzle Me, it's a clear based silver holographic chunky glitter. It's packed full of fine silver glitter pieces as well as larger holographic hexagonal glitters. I find the lager glitter pieces tend to over power the fine glitter, but that's fine with me. It really is a truly gorgeous glitter polish. I like to use it when I'm doing a glitter accent nail, or doing gradient glitter nails. It also looks great with one coat applied over almost any color for a quick manicure. Unlike some glitter polishes, where you find yourself fishing for glitter, this one is packed full of glitter. You get a good amount of both fine and larger glitter with each coat. However, it will still take at least 3 coats if you want nothing but glitter. 

My biggest complaint is one I have with most chunky glitter polishes. The larger glitter will sometimes get caught on fabric or something. Even with a top coat, it still happens. As you all know, I always finish my nail designs with a top coat. It doesn't matter what top coat I use, it's still a rough texture. That might also lead to a glitter getting stuck to something, and then causing the polish to chip sooner than normal. It's not that bad, I'm just trying to give an honest review. Maybe, with a second coat of the top coat it wouldn't happen. 

In conclusion, I love this polish, and will happily continue to use it. It can be hard to find, I am pretty sure Pure Ice is only sold at Walmart. If you're looking for a good silver holographic  glitter, run and get it! Plus, it's under $2! You just can't go wrong! I'll insert pictures below. I hope you enjoyed today's review. If you want to keep up to date on what I'm doing don't forget to like me on Facebook!
Have a Blessed weekend,


Thursday, April 11, 2013

Gradient glitter nail Tutorial

Hello again, everyone! I have another blog post coming your way! I hope you're ready and excited! Today's post is another nail tutorial. It's a very simple, but doesn't look it. It looks like you spent more time on your nails than you actually did, gotta love that. Are you ready to get into today's tutorial? Let's get into it!


If you want to see how I created this look, keep reading!
__________________________________________________


                                                 Products used:
                                  Base coat: Nail-aid, 3 Minute Artificials
                           Mint green: Rimmel 60 second, Mintilicious
                             Baby blue glitter: Sinful colors, Cinderella 
                             Chunky silver glitter: Pure ice, Dazzle me
                                   Top coat: Sally Hansen, Insta dry
                                          Wedge makeup sponge 
                     Nail polish remover: Onyx, 100% pure acetone  
    paint brush for getting off any polish that got onto my skin

__________________________________________________


Step 1: On clean dry nails, apply your favorite base coat.

Step 2: Choose what nails you want to be your accent nails ,and leave them bare. Paint all of the non-accent nails with any color of your choice. I chose a mint green.
__________________________________________________


Step 3: Apply 1 coat of a sheer glitter on all nails. I chose a baby blue color. It almost makes my mint green look like a Tiffany blue. Before moving to step 4, let your nails dry for a couple minutes.

Step 4: Apply 1 coat of a chunky glitter of your choice, and let it dry for a couple minutes. 
__________________________________________________


Step 5: Apply a second layer of the chunky glitter. I wanted a little of the blue glitter to shine through.

Step 6: Apply a little of the chunky glitter polish to the edge of a wedge makeup sponge. 
__________________________________________________


Step 7: Carefully, sponge the tips of each non-accent nail with the chunky glitter. You'll have to apply glitter to the sponge for each nail. Concentrate the glitter on the very tip, and blend it down a little. So that there is a little gradient of glitter, instead of a harsh line.

Step 8: Apply one coat of your favorite top coat. Then, using either a cotton bud or paint brush dipped in nail polish remover, clean up any nail polish that may have gotten on your skin. That's it, you're finished!

__________________________________________________


I hope you enjoyed this tutorial, and give it a try! It's really easy, and makes you look like a pro. This is one of my go to looks when I don't have time, or just don't feel like going into a detailed look. If you're looking into getting into nail art this is a great starting place. It takes just a couple minutes, and looks amazing. If you try it, I would love to see! You can share your pictures on my Facebook page! If you want to stay up to date on what I'm doing, like me on Facebook. You can also follow me on, twitter, and instagram if you want to see even more. I hope you found this tutorial helpful, and learned something new. 
Have a blessed day,