Showing posts with label coral. Show all posts

Monday, June 3, 2013

Tutorial: Girly Coral with white stripes

Hello again everyone! I'm happy to bring another tutorial to you guys this Monday afternoon. I hope you're all having a wonderful day. I was inspired to do this design when I saw a cute phone case on amazon the other day. I'll insert a picture of the case at the end of the tutorial if you want to see it. Today's tutorial is pretty simple, so let's get into it. If you have any questions feel free to ask. I'd love to hear from you. If you try this design out, share it with me on Facebook, Twitter or Instagram, I'd love to see! Like me on Facebook to see more from me. I'm also on Instagram and Pinterest, and Twitter . Check out my other blog if you'd like to see non nail related blogs. Have a blessed day,


If you want to learn how I created this design, keep reading :-)

Products used:
Base coat: Nail-aid, Triple Wrap Thickener
Pinky/Coral: Sally Hansen, I Pink I Can
Chunky silver glitter: Pure Ice, Dazzle Me
Silver glitter striper: Ice Breaker
White: Apple Barrel Colors, White 
Top coat: Sally Hansen, Insta-Dri
Detail brush
Dotting tool

 Step 1: As always, start by applying your favorite base coat.


 Step 2: Using the color of your choice paint your accent nails. I chose my thumb and ring finger to be my accent nails. 
 Step 3: Using the same color, on your non accent nails paint angled tips. I find it easiest to start at the bottom and sweep my brush upward. 


 Step 4: Using either a white nail striper, or white paint and a detail brush paint vertical lines on your tips. You can make them as thick or thin as your like. I used a detail brush and white acrylic paint. This design would still look nice if you skip this step.


 Step 5: On your accent nails use the same nail striper/detail brush and paint, and paint diagonal lines in one direction. It should look kind of like a pink candy cane.


 Step 6: use the same nail striper/detail brush and paint, and paint diagonal lines in the opposite direction. Crossing over the first set of lines. Creating diamond shapes, like fishnets, or lattice.


 Step 7: This step is optional, but I love how it turned out. I took a chunky silver glitter, and put some of it on a piece of paper. Then I took a dotting tool, and picked up the large hexagonal glitter out one by one and placed them where the lines crossed. 


 Step 8: Using a silver glitter striper, place a line of silver glitter at the base of your angled tips. This just creates a more finished look.


 Step 9: Allow your design to dry for a couple minutes, and apply your favorite top coat. Then go in with a cotton bud or paint brush dipped in nail polish remover and clean up any polish that might have gotten on your skin. You're all done, this was the final step! 


Friday, May 31, 2013

NOTD: Pinky/Coral scalloped nails

Hello again everyone! What do you guys think about my new blog design? I worked hard on it yesterday, and I love it! I have another NOTD(nails of the day) for you. I'm not sure how I feel about these nails to be honest. I kinda like them, but they aren't quite what I had imaged when I thought up the design. That happens sometimes though, and I don't have time nor patience to redo them. I figured I'd share them with you despite how they turned out. I hope you all enjoy them more than I do. If you have any questions feel free to ask. I'd love to hear from you. If you try this design out, share it with me on Facebook, Twitter or Instagram, I'd love to see! Like me on Facebook to see more from me. I'm also on Instagram and Pinterest, and Twitter . Check out my other blog if you'd like to see non nail related blogs. 
Have a blessed day,


Products used:
Base coat: Nail-aid, Triple Warp Thickener
Pinky/Coral: Sally Hansen, I Pink I Can
Silver glitter: Queen of Beauty
Top Coat: Sally Hansen, Insta-Dri
White acrylic paint: Apple Barrel Colors, White
Dotting tool
Detail paint brush


Wednesday, May 22, 2013

NOTD: Fun Spring Mint and Coral Nails

Hello everyone! I hope you're all having a great week. My heart and prayers go out to any of my readers effected by the recent bad weather. In happier news, I have another NOTD(nails of the day) for you today. I hope you enjoy today's nails. I'd love to hear your thoughts on them.  If you have any questions feel free to ask. I'd love to hear from you. Like me on Facebook to see more from me. I'm also on Instagram and Pinterest, and Twitter . Check out my other blog if you'd like to see non nail related blogs. 
Have a blessed day,


Products used:
Base coat: Nail-aid, Triple Wrap Thickener 
Mint green: Pure Ice, Home Run!
Pink/Coral: Sally Hansen, I Pink I Can
Holographic Silver: L.A. Colors, Live
Fine silver glitter: Sinful Colors, Queen of Beauty
Chunky silver glitter: Pure Ice, Dazzle Me
1 Detail brush, and dotting tool


 Pinky: I started with mint green, then using a detail brush to do the coral stripes, then went in with a white acrylic paint and added the white stripes. Next I took the larger hexagonal pieces out of the dazzle me polish and placed them one by one on the white lines. 

Ring Finger: I started with a holographic silver polish, and then applied 2 coats of chunky silver glitter. 

Middle finger: I started with the coral polish, then made a white triangle using acrylic paint. Then a slightly smaller triangle using mint green polish, then an even smaller triangle using silver holographic polish and then topped the silver triangle with a fine silver glitter. Here is my detailed tutorial for this nail design.

Index finger: I started with the mint green polish. Then using a detail brush and the coral polish, I made a thin vertical stripe going down the center of my nail. Then using the white acrylic paint and a detail brush I outlined the color stripe. Then I used the large hexogonal glitters from dazzle me I placed them one by one with a dotting tool up the center of the coral stripe.


Thumb: I started with the coral polish. Then I went in with the mint polish and a detail brush and painted the chevron print. I picked one line and filled it in with the holographic silver, and then topped that with the fine silver glitter. 
__________________________________________________


Friday, April 5, 2013

NOTD: Pink, and While polka dots

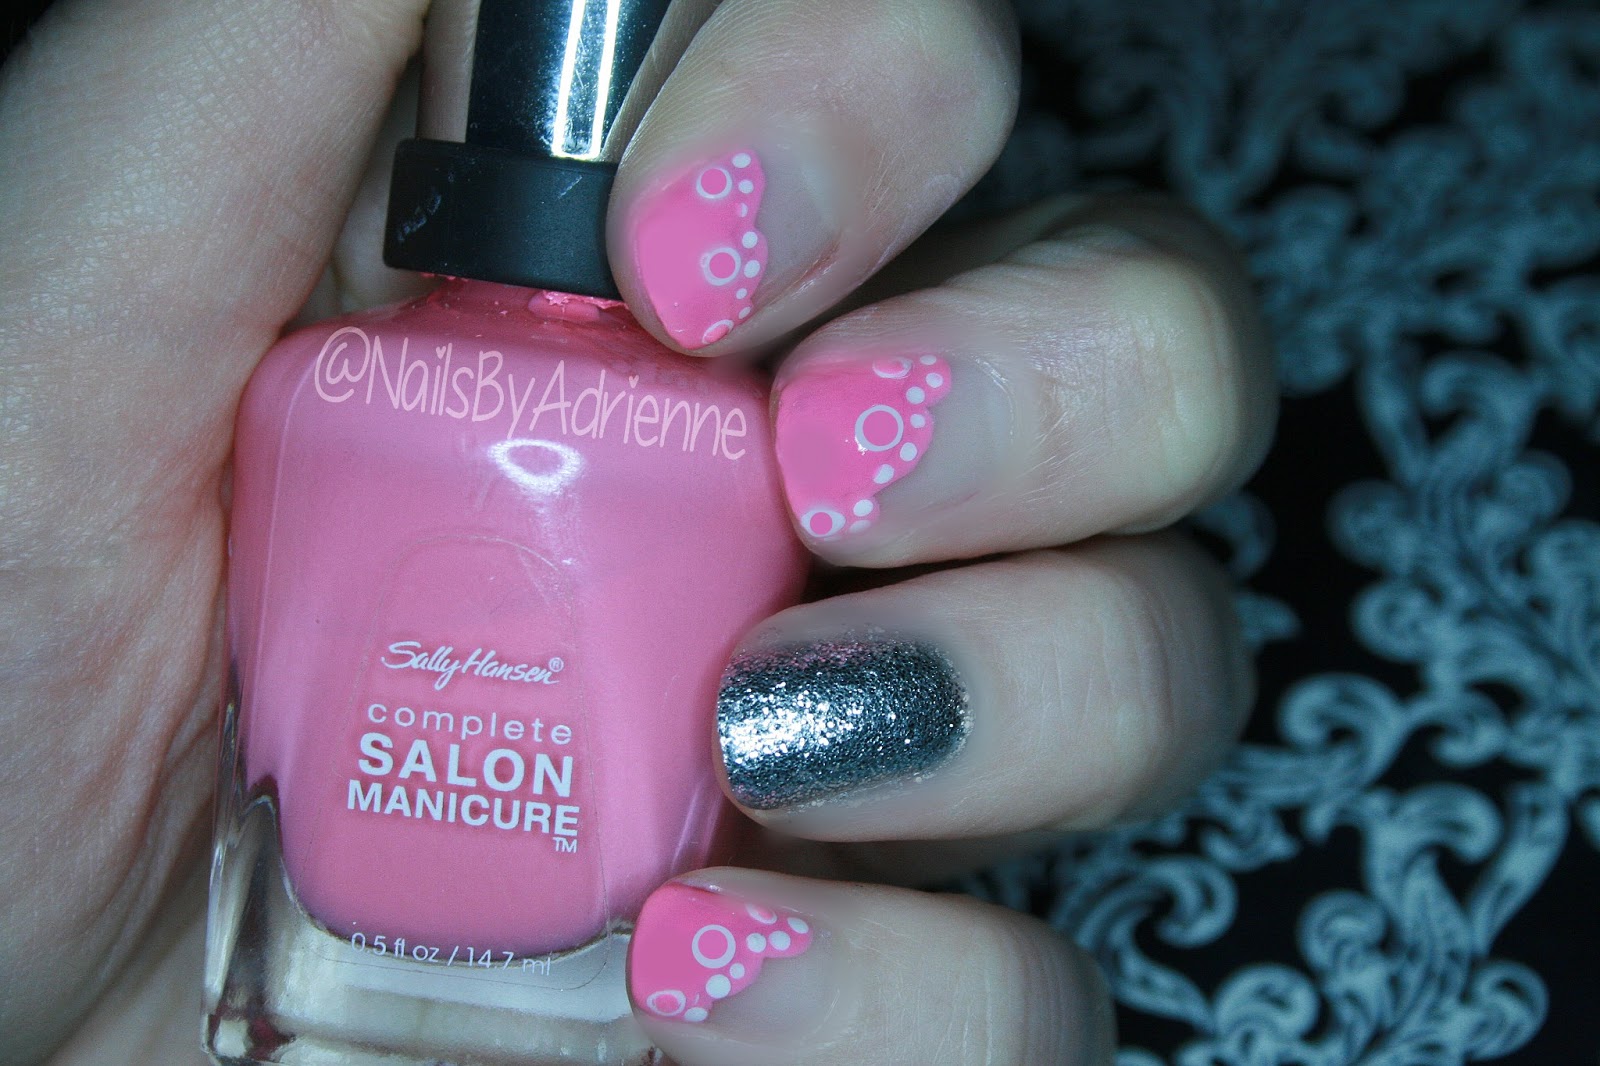
Hello again, everyone! I hope you're ready for a new post! Although, I guess it doesn't matter if you're ready or not. Today's post is another, Nail of the day. I'm loving these nails! They are really simple, I think anyone could do them. They look girly, and ready for spring. When I get my video camera working, I can record a video tutorial if you'd like. It's so simple, Start with your favorite base coat, paint your nails with whatever color you'd like in whatever way you'd like. When your polish has dried go in with a dotting tool, or a toothpick, and place your dots in whatever color you want. I finished my tips with a line of silver glitter again. Then add a top coat and that's it! I hope you like my nails today, and if you try the look out let me know, I'd love to see! You can share your pictures on my Facebook page!
Have a blessed day, 


Products used:
Base coat: Nail-aid, 3 minute artificials
Pink: Sally Hansen, I pink I can
White: Apple Barrel colors, White
Top coat: Nail-Tek, Quicken