Sunday, March 31, 2013

How I remove nail polish

Before I get into today's blog, I want to wish everyone a, Happy Easter! 
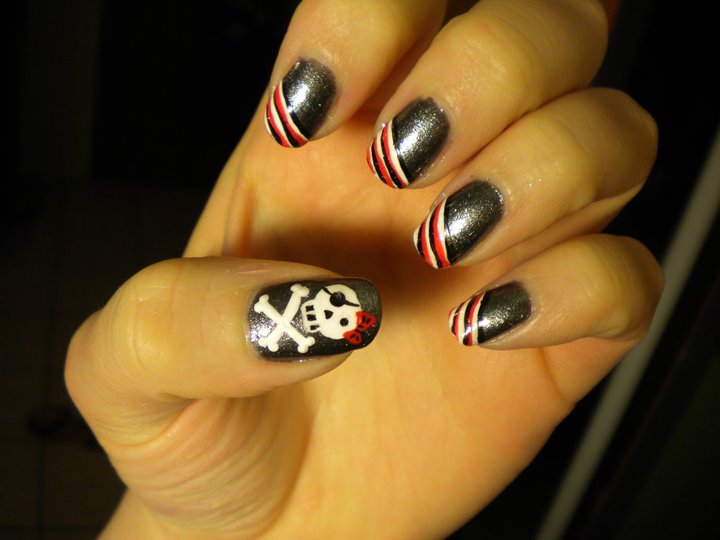
Now, onto my blog. Today's post is going to be about my favorite way to take my nail polish off. It's a couple extra steps, but I promise, it's worth it. The couple extra steps make it so easy to get all nail polish off. Yes, that includes glitter polish! Anyone in who loves glitter polish knows just how hard it is to get off. This trick takes glitter polish off without using 100 cotton balls, scrubbing, and getting glitter everywhere. It works on dark polish, and red polish, too! I saw this trick on Pinterest, and thought why not give it a go. It works for me, and I am so happy I found it. Yay, Pinterest! I hope you find this trick as helpful as I did.

__________________________________________________


Step 1: You have nail polish you want to remove, get a cotton ball and your nail polish remover.

Step 2:Unroll your cotton ball.
__________________________________________________


Step 3: Fold your unrolled cotton ball in half.

Step 4: Fold your unrolled cotton ball in half one more time.

I know it seems silly, because now it looks almost like it did before we unrolled it. You're probably thinking "why did I unroll it". I've tired skipping these steps, but it didn't work as well. Just trust me, it's worth it.
__________________________________________________


Step 5: Grab your nail polish remover.

Step 6:Saturate you cotton ball. Make sure it's very well saturated all the way through.  

(yes, I know 100% pure acetone is very bad for your nails, but it's what I use. It takes all my polish off so much easier, and faster. Plus, I hate the taste of non-acetone based removers that is impossible to wash off. No matter how many time you wash your hands hours after taking your polish off you go to eat dinner, and bam all you taste nail polish remover)
__________________________________________________


Step 7: Unfold your cotton ball, and tear it into 5 little pieces  Place on piece on each nail. Make sure each piece is push firmly on each nail. Leave them on for 1-2 minutes. (sometimes I don't wait more than 30 seconds and it still works. For harder colors to remover, and glitter it's important to leave it on for longer.)

Step 8: Slide the cotton piece off your nail. Just press down firmly on the cotton piece, and slide it up and off your nail.
__________________________________________________


This is what your nails should look like when you've finished all the nails. 

I've seen other people do the same thing only wrapping each nail in foil after placing the cotton pieces saturated in nail polish remover on your nails. I've never tried that, but if you have trouble with your cotton pieces drying out before your ready to take the polish off then wrap each nail in foil. I might do a separate blog post on that later. If you want to see it, just let me know. 

Ok, that is the end of my post today. I hope you find it helpful, and learned something new.  I wish you all a happy Easter, and I hope you're spending this wonderful holiday with your family.
Have a blessed Easter, and don't forget, Matthew 28:6,

Saturday, March 30, 2013

Easter Bunny Nail tutorial

Hello again, everyone! I just got this Easter Nail tutorial uploaded to YouTube! Seeing as Easter is tomorrow,  I figured it's now or next year to recreate this design, I did last year. The video really isn't great, and for that I apologize. I seem to have lost the charger for my better video camera, this one didn't even auto-focus. I will get that resolved, so please bear with me as I get the poor video situation sorted. Also, the lime green I used in the very beginning  needed to be a more pale light green, but I couldn't find the right color.    I hope you still find the video helpful. I will get better videos as soon as possible. 


This design was inspired by fellow YouTuber  Robin Moses, if you don't know who she is, go check her out! She is amazing, and I have learned so much through her videos. I'll link to her video, and her YouTube page bellow. 
The video that inspired me: http://www.youtube.com/watch?v=4y9CJuKlytw 

I hope you all have a wonderful Easter! Don't forget what Easter is really all about, Matthew 28:6.
Have a blessed day,


Friday, March 29, 2013

Product not worth the hype: Nail-Tek foundation II

Hi, Everyone, time for another blog! Are you excited? Today my post will be about a "must have nail product". I heard so much about this product, and it was so hyped up to be the last base coat I would ever need. I've read blogs, and seen videos, about this product, everyone loves it. Except me, it seems. So, what is the product you ask? Nail-Tek foundation II, their site says 
"Nail Tek FOUNDATION fills unsightly ridges and nail damage while strengthening the natural nail. This unique base coat is a special blend of strengtheners, conditioners, micro-fibers, and natural fillers, creating a superior surface that greatly increases polish adherence for a long-lasting manicure. Smoothes uneven nail surfaces and masks nail imperfections for healthy, beautiful nails."
Sounds too good to be true, doesn't it? It was too good to be true. I was excited when I found this product at a discounted price at Big Lots back a while ago. I paid $7 for a pack that came with Nail-Tek Quicken, top coat, and Nail Tek Foundation II. That's a great deal seeing as on their site, Foundation II was $11. I bought 2 packs, so I had 2 bottles to test and see if it was worth the hype. That should be more than enough to get a good idea of how the product would work for me.
The foundation line of base coats comes in 4 varieties. Foundation I: For strong healthy nails
Foundation II: For soft, peeling nails 
Foundation III: For dry, brittle nails
Foundation Xtra: For difficult, resistant nails

I have soft peeling nails, so foundation II is the one that is made for my nails. I had read blogs about how it stopped the peeling, and kept their polish from chipping for 7+ days. Don't get me wrong, it wasn't a horrible product, it just didn't meet my expectations. It didn't stop my nails from peeling, it didn't keep my polish from chipping. It did however, help my nails to grow longer, and semi stronger. So, it wasn't a total loss. Allthough, I don't have a problem getting my nails to grow long with other cheaper, base coats. I love Sally Hansen maximum growth, and at $4, it's a much better buy.

Maybe  Nail-Tek Foundation II will work for you, as it has for so many others. It just didn't work out for me. So, I'm still on the search for the best base coat. In the end, I say save your money, and skip this "must have nail product". 


I hope you found my review of this product helpful, and insightful. I know this product might work for others, just didn't work out for me. Thank you for taking time out of your day to check my blog out.
Have a blessed day,


Wednesday, March 27, 2013

Easy Pastel nails for sping

Hi, everyone, I hope you're as excited as I am for my first actual nail tutorial blog! Just in time for Easter I have this pastel nail tutorial for you. Originally, I was planning on making this a video tutorial, but the video didn't work out. Alas, at least I remembered to take pictures of each step, right? 


If you want to see how I created this design, keep reading.
__________________________________________________


Above, is a picture of all the products I used in my design.
Base coat: Nail-aid, Triple wrap thickener
Light pink: Essie, French Affair
Hot Pink: Orly, Sterling silver rose
Pink glitter: Pure ice, Spit fire
Top coat: Nail-Tek, Quicken
Acrylic paint: Apple Barrel colors, white, and bright magenta


________________________________________________


These are the brushes I used to make this design. One detail brush, and the larger brush for cleaning up my nail beds after I finish my design for a cleaner look. 
__________________________________________________


  (step one should have been a picture of my nails with just a bast coat on, but I forgot to take that picture. When doing any nail painting, you should always apply a base coat. Not only does the base coat keep your polish on longer, but it also protects your nails against staining )

Step 1: After applying your favorite base coat, apply 1-2 coats of a light pink(or any color of your choice) on all of your finger except whichever finger you choose to be your accent finger. Leave your accent finger blank until step 2. 

Step 2: While allowing your other color to dry, move on to your accent nail. Paint it a darker/brighter coordinating color. In my case a hot pink.

Allow all of your nails to dry for a few minutes before moving on to step 3.
__________________________________________________

Step 3: This is an optional step. It doesn't show up well in the picture, but I applied a fine sheer glitter over my light pink.
Step 4:  Apply 1-2 coats of a coordinating glitter.

once again, for best results, wait for your polish to dry before moving on to the next step.( I skip this step all the time, and then get mad when I smudge my wet nails)
__________________________________________________


Step 5: Using either a dotting tool, or a toothpick, apply 3 dots in white paint(nail polish, or acrylic paint, I used acrylic). One dot where you want each corner of your triangle to be. You could skip this step and freehand your triangles if you feel comfortable. I find this way easier to keep my triangles uniform.

Step 6: Like when you were in kindergarten it's time to play connect the dots. Carefully paint a line connecting your dots. Then fill in the triangle. 
________________________________________________ 
Step 7: Using the same color you used on your accent nail, do like you did with the white, and place 3 dots where you want the corners of your second triangle to be. Make sure and place your dots far enough in so that some of the white will show along the outside of the smaller triangle.
(instead of using polish, I used acrylic paint in the same color as my accent nail. I find that acrylic is easier to work with)
Step 8: Connect your dots, just like before.

_________________________________________________________________________________


Step 9: Fill in your smaller triangle.

Step 10: Apply a little of the same glitter you used on your accent nail, in an even smaller triangle. Leaving a little border of the second triangle.(does that make sense? I hope that makes sense)
__________________________________________________

Step 11: After waiting for your nails to dry, again, apply your favorite top coat. I always use a fast drying top coat to speed things up. The top coat, seals in your design, and also helps prevent chipping. Now, is when you use your favortie nail polish remover to clean up your nails. Just dip a paint brush or cotton bud in the nail polish remover, and carefully remove any polish that might have gotten on your skin.

Step 12: The final and optional step is to apply a cuticle oil over the nails and cuticles. This just adds a barrier between your nails and life to prevent smudging while waiting for them to completely dry. Plus it is very good for your nail beds, and promotes long healthy nails. Coconut, almond, jojoba, avocado oils are all some of my favorite to use.
__________________________________________________

Below are closer pictures of all the products I used.


Thank you for making it to the end of my first tutorial! I hope you enjoyed it, and found it helpful. 
Have a blessed day everyone!

My First Post! My favorite nail designs.

Welcome to my blog! I'm new to the blogging world, and I'm not sure what to do for my first post. I have so much I want to share with you all! So, I've decided to show you all some of my favorite nail designs I've done over the years. Seems fitting for my first post, right? I will go in more detail about colors used, and how I accomplished each look in a later post. As for this post, it's just to give you all some insight as to what kind of work I like to do. I apologize in advance for some of the photo quality, some of these pictures are a few years old. Let me know what you think, and which designs you'd like me to do a tutorial on. 
I hope you're all having a blessed day,